Soundproofing basement ceiling projects might seem daunting at first, but they represent one of the most meaningful improvements you can make to your home’s acoustics. Your basement ceiling plays a crucial role in sound transfer between floors as mechanical sounds move through physical structures. Sound barriers that measure nowhere near half an inch thick can make a significant difference in basement ceiling soundproofing, whether your space is finished or unfinished.
The right insulation materials and techniques need careful thought for soundproofing basement ceiling areas. A simple extra layer of drywall blocks noise effectively. Mass-loaded vinyl proves particularly useful as a soundproofing solution for walls and floors. Soundproofing methods differ between unfinished basement ceilings and basement drop ceilings, though both deliver excellent results with proper installation.
This piece offers a complete walkthrough of basement ceiling soundproofing essentials. You’ll learn how sound travels through ceiling materials and the best insulation choices available. Our step-by-step guidance will help create a quieter home environment. These techniques not only reduce noise but also boost your space’s thermal comfort significantly.
Understanding How Sound Travels Through Ceilings

Understanding how noise moves between floors is crucial before you spend money on soundproofing materials for your basement ceiling. Without this knowledge, even expensive solutions might not give you the quiet space you want.
Airborne vs. impact noise explained
Sound makes its way through ceilings in two different ways. Each needs its own solution. Airborne noise comes from things like voices, music, and TV that move through the air. These sound waves sneak through any gaps, ducts, and thin barriers they can find between floors.
Impact noise (also known as structure-borne sound) happens when something physically hits a surface above you. Footsteps, dropped items, or furniture moving create vibrations that travel through solid materials. These vibrations pass right through joists, studs, and concrete, making them really tough to stop.
Why ceilings are a major weak point
Your home’s acoustic defense system has a major weakness – the ceiling. Sound can travel both above and through ceiling materials, creating multiple paths for noise. The spot where walls meet the floor is usually the weakest link, and this becomes a bigger problem in buildings with multiple floors.
Sound acts like water in many ways. You can seal 98% of a wall, but just one tiny hole will let sound through and undo all your work. So every single gap in your ceiling needs proper sealing against air movement. Missing even one spot can make your other soundproofing efforts useless.
How sound moves through joists and drywall
Impact noise from the floor above makes the ceiling vibrate, which then shakes the connected walls. These vibrating surfaces work just like big speakers and send sound right into the rooms below.
Joists create a direct path for structure-borne noise in basement ceiling installations. They connect floor surfaces straight to ceiling materials, which lets noise travel easily. Regular drywall doesn’t help much with sound blocking on its own.
Your soundproofing needs to tackle both airborne and impact noise at once to work well. The best results come from combining several methods: decoupling (keeping structural elements separate), adding mass (making things denser), damping (reducing vibrations), and sealing any spots where sound might leak through.
Best Materials for Soundproofing a Basement Ceiling
The right materials can make a huge difference in solving noise problems in your basement. Let’s get into the best options that will help create a quiet space under your home.
Mass-loaded vinyl (MLV)
MLV is a thin yet incredibly dense material that’s built specifically to soundproof spaces. It combines vinyl for flexibility with mineral fillers for weight, which helps block sound transmission through its mass. This material creates a powerful sound barrier at just 1/8-inch thick (1 lb/sq ft) or 1/4-inch thick (2 lbs/sq ft) without adding much bulk to your ceiling.
The main function of MLV is to block airborne noise rather than absorb it. It works best when installed against ceiling joists, which separates the finished ceiling from the structure and stops vibration transfer. You’ll get the best results by combining MLV with other soundproofing elements like resilient sound isolation clips and Green Glue to maximize sound transmission loss.
Acoustic insulation: fiberglass vs. mineral wool
Mineral wool and fiberglass insulation each have their own unique properties. The density of mineral wool is three times greater than fiberglass, which makes it better at soundproofing. Mineral wool’s STC rating ranges from 45-52, beating fiberglass in blocking sound transmission.
Fiberglass comes with its own benefits, though. It costs 20-50% less than mineral wool, which helps when you’re working on big projects. You’ll find it easier to install, lighter to handle, and accessible to more people at hardware stores.
Both materials resist fire well, but mineral wool has a higher melting temperature. The environmental impact varies too – mineral wool contains about 70% recycled content while fiberglass has 20-30%.
Drywall and Green Glue compound
The density and absorption properties of drywall make it an excellent sound barrier. Most experts suggest using 5/8-inch fire code drywall instead of standard 1/2-inch thickness to boost soundproofing.
Green Glue substantially improves soundproofing when applied between drywall layers by turning sound vibrations into heat energy. You’ll need to apply this damping compound from caulking tubes between all drywall layers and along seams. Multiple drywall layers with Green Glue between them create the most effective sound barrier.
Acoustic panels and ceiling baffles
Sound waves get absorbed by acoustic panels before they can bounce back, which cuts down on echo in your basement. You can choose from various materials like foam, fiberglass, cotton, and polyurethane, each with different sound absorption levels.
Ceiling baffles hang vertically from the ceiling and offer more surface area to reduce sound echo. They work really well in large, open basement spaces that have hard floors. These hanging treatments help improve speech clarity and overall acoustics without major ceiling changes.
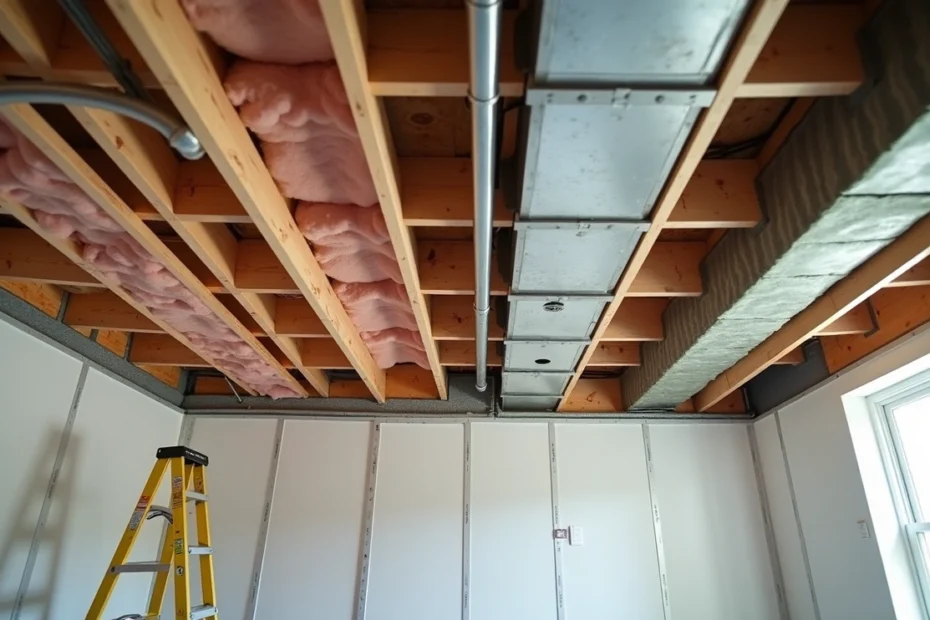
Soundproofing unfinished basement ceiling options
An unfinished basement ceiling with exposed joists actually gives you more soundproofing choices than finished ones. A simple budget-friendly fix is to fill joist cavities with acoustic insulation. You can hold mineral wool or fiberglass insulation in place using 1½-inch wood strips attached to joist faces.
The best results come from installing resilient channels or sound isolation clips to separate the ceiling from the joists, which stops vibration transfer. This method, combined with MLV and multiple drywall layers, creates a complete soundproofing solution that works even in the noisiest spaces.
Step-by-Step Guide to Soundproofing Your Basement Ceiling
You’ve learned about the materials, so let’s get to work. A systematic approach will give you excellent results in your soundproofing project.
1. Inspect and seal all gaps and cracks
The first vital step in soundproofing is to eliminate all possible sound leaks. Small gaps can substantially reduce your entire soundproofing system’s effectiveness. You’ll need a ladder and good lighting to get into the subfloor above your basement. Look for cracks between sheets and around penetrations.
Seal these openings with acoustic caulk or Green Glue. Pay special attention to joist-to-subfloor connections and utility penetrations. Sound acts just like air – it will find any available gap. Larger openings might need expanding foam designed specifically for soundproofing.
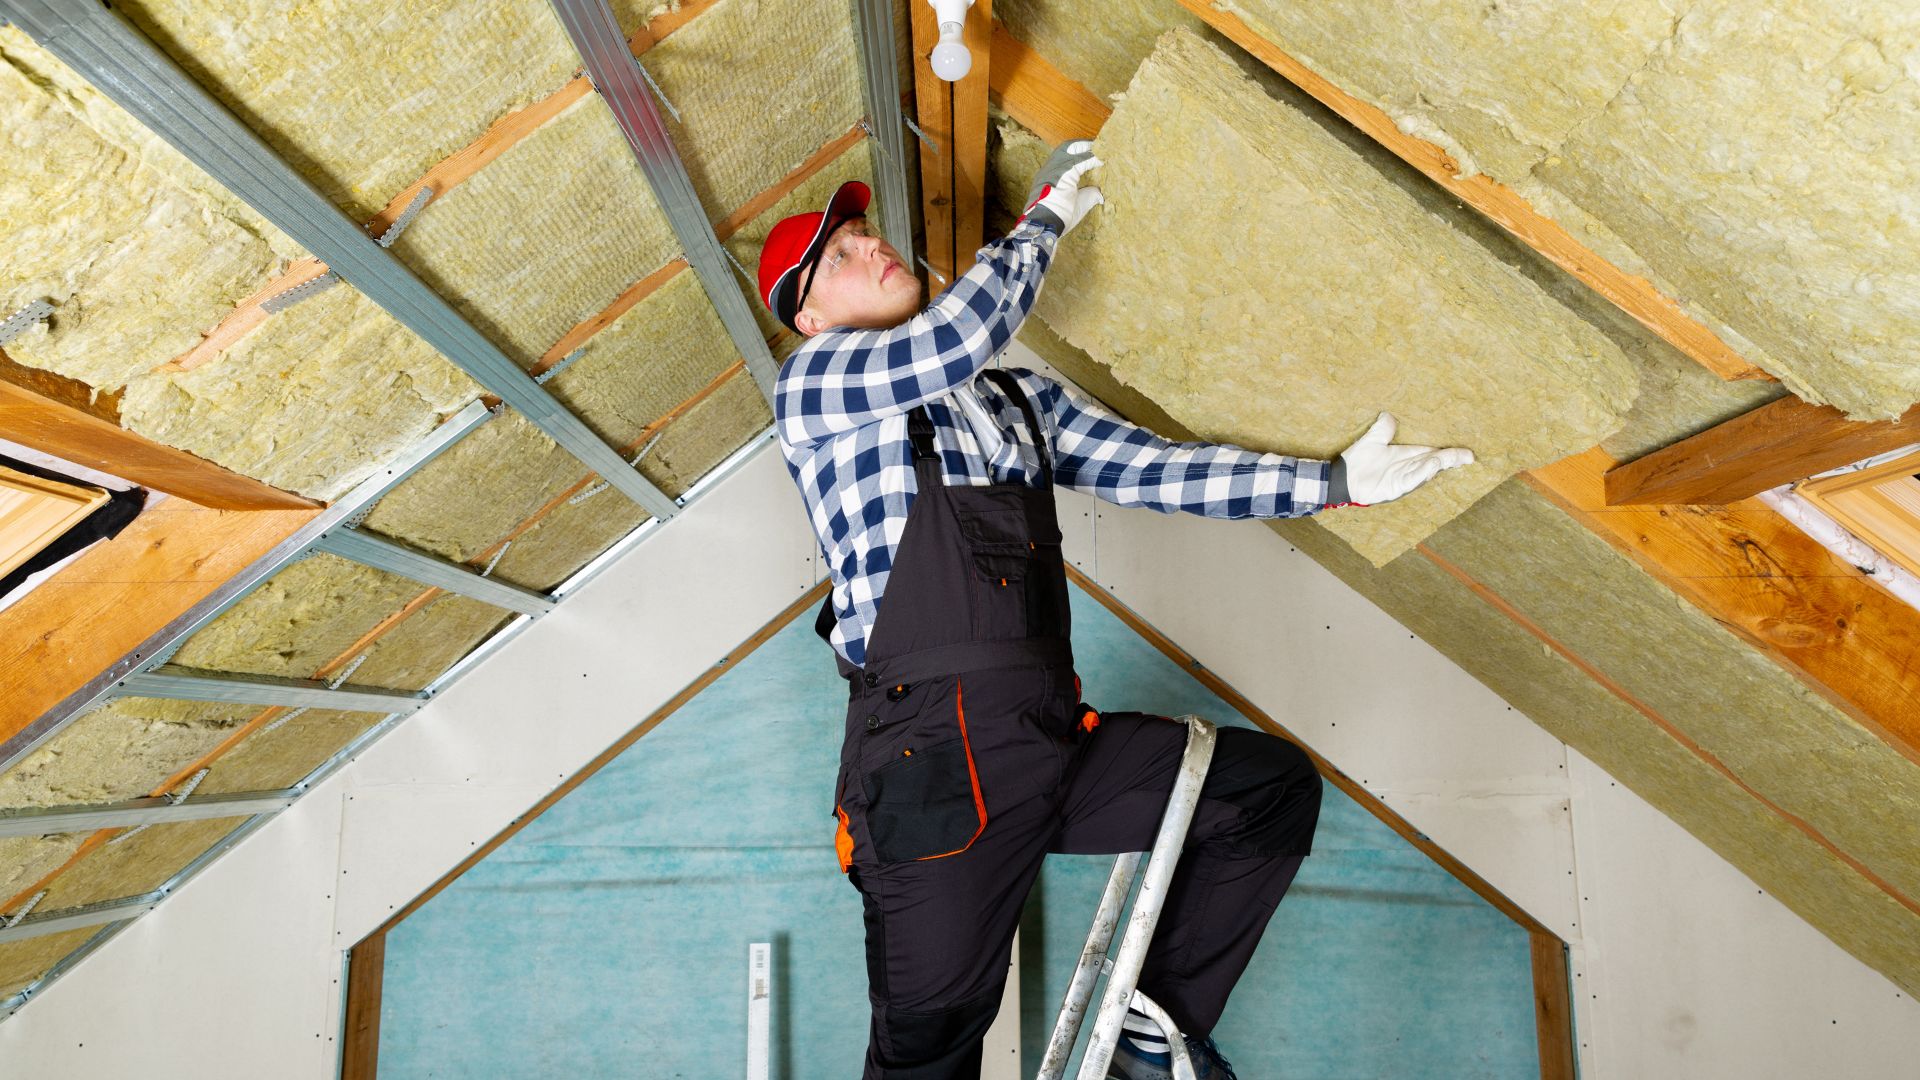
2. Add insulation between joists
Cut strips of insulation to fit snugly between your ceiling joists. Standard fiberglass works well enough, but mineral wool (like Rockwool Safe and Sound) absorbs sound better. The pieces should be slightly oversized to create a friction fit that won’t sag later.
The insulation needs proper support. Attach 1½-inch wood strips to the inside faces of joists, right at the bottom edge. This creates a solid platform that keeps insulation in place while maintaining the right density for sound absorption.
3. Install resilient channels or sound isolation clips
Sound isolation clips and resilient channels create vital decoupling between the ceiling structure and finished surface. Draw horizontal lines across joists at 16-inch intervals. Attach sound isolation clips along these lines with 1⅝-inch drywall screws.
Hat channels (metal furring strips) snap into these clips and run perpendicular to the joists. This creates a floating framework that reduces structure-borne noise transmission. The installation must be precise – any drywall screws that penetrate through to the joists will create a “short circuit” and compromise soundproofing.
4. Apply MLV or acoustic barriers
Mass-loaded vinyl directly against the joists improves effectiveness. This dense material blocks sound transmission. MLV seams should overlap by at least 2 inches and need sealing with acoustic tape.
Use roofing nails or screws with washers every 8 inches along studs and plates to secure the MLV. Electrical outlets need special attention – press the MLV against the box, cut around it carefully with a utility knife, and seal gaps with acoustic caulk.
5. Add drywall layers with damping compound
The first layer of 5/8-inch fire-rated drywall goes perpendicular to the hat channels. Use ¾-inch drywall screws that only penetrate the channels—not the joists above. All seams need acoustic caulk or Green Glue.
The best soundproofing comes from adding Green Glue damping compound to your second drywall layer’s back before installation. Two tubes per 4’×8′ sheet in a random pattern works well, but leave a 3-inch border for handling. Press this layer against the first one right away and secure it with 1⅝-inch screws into the hat channels. Layer seams should be offset to block sound transmission paths.
6. Finish with ceiling panels or tiles
The ceiling needs materials that improve sound absorption. Finished ceilings require drywall tape and compound on all seams, followed by acoustic paint for extra sound dampening.
A drop ceiling system below your soundproofed structure might work better. It creates another air gap to improve sound isolation and allows easy access to utilities. Look for acoustic ceiling tiles with high NRC (Noise Reduction Coefficient) ratings to reduce reflected sound in the space effectively.
Special Considerations for Different Ceiling Types
Basement ceilings come with unique challenges and opportunities to soundproof. You can achieve the best noise reduction by understanding what works for different types.
Soundproofing basement drop ceiling
Drop ceilings are a great alternative to drywall installations. These suspended T-grid systems naturally create a gap between surfaces that acts as a sound barrier. Sound waves get absorbed better when you replace standard tiles with acoustical panels. The noise reduction improves even more if you add mass-loaded vinyl or acoustic insulation above the tiles. The tiles’ removable design makes future repairs available – you just need to take out and replace tiles as needed.
Working with exposed joists in unfinished ceilings
Unfinished ceilings with exposed joists give you more soundproofing options than finished ones. The open framework lets you access joist cavities directly to install mineral wool or fiberglass insulation. This setup makes it easier to wrap insulating materials around pipes and ductwork. The best results come from securing insulation with 1½-inch wood strips attached to joist faces.
Dealing with HVAC and ductwork noise
HVAC systems create unwanted noise through vibrations and air movement. Your house’s ductwork becomes a “highway” for sound. You can curb this by wrapping ducts with vibration-dampening materials like Vibra Block or RoadblockR. Air noise reduces when you install flexible connectors between ducts and equipment, plus acoustic duct liners absorb sound energy. Rubber pads help isolate pipes from wood structures to handle ductwork noise.
Fire safety and moisture resistance
Your basement needs extra attention to fire safety and moisture resistance. Fire-rated 5/8-inch drywall provides better soundproofing than standard 1/2-inch varieties and ensures fire protection. Rockwool Safe’n’Sound is a great choice for insulation as it resists temperatures above 1,000°C without producing toxic smoke. This material absorbs sound well and stays water-resistant – a vital feature in moisture-prone basement environments.
Conclusion
Science meets smart implementation when it comes to soundproofing your basement ceiling. This piece explores how sound moves through ceiling materials and the key differences between airborne and impact noise. These principles are the foundations of any successful soundproofing project.
Your choice of materials will determine how well the soundproofing works. Mass-loaded vinyl gives you great density in a thin profile. Mineral wool works better than fiberglass at absorbing sound, though it costs more. The ceiling’s sound-blocking power gets a substantial boost when you combine multiple layers of drywall with Green Glue.
A detailed step-by-step method helps cover all possible sound leaks. Sound acts like water – it finds the easiest path through. Sealing every gap becomes as vital as putting quality insulation between joists. Resilient channels give you the vital decoupling that stops vibration transfer. Properly installed drywall layers add the mass needed to block sound waves.
Each ceiling type brings its own set of challenges. Drop ceilings let you access things easily, but they need special acoustic tiles. Exposed joists might look unfinished, but they give you more soundproofing options. HVAC systems need extra attention since ductwork can create unwanted sound paths throughout your home.
Fire safety and moisture resistance should stay top priorities when picking basement materials. Many great soundproofing options include these vital protections.
Time and effort spent on proper basement ceiling soundproofing will reward you with years of comfort and enjoyment. Your quiet space will turn your basement into a peaceful getaway from upstairs noise, giving you the sound separation you’ve wanted.