
Basement remodeling costs can range anywhere from $2,800 to $100,000. This makes it one of the most variable home improvement projects we encounter. The average homeowner spends around $30,000 on a complete basement finish, and I found that there was several ways to dramatically reduce these costs without compromising quality.
Smart planning and strategic decision-making can make basement renovations yield an impressive 70% return when selling your home. The secret to maximizing this value while minimizing expenses depends on knowing where to save and spend money. This piece shares proven strategies that can help you save thousands on your basement remodeling budget and create a space you’ll love.
Planning Your Basement Remodel to Maximize Savings
A good plan can save you thousands on your basement finish. Many homeowners dive into basement remodels without proper prep work. This leads to blown budgets and letdowns. You need a solid strategy that looks at your space, budget, and skill level before picking up a hammer or calling contractors.
Assessing your space and setting realistic goals
Your basement’s success starts with a good look at what you have. Start with a full inspection of your basement’s current state. Check for water damage, foundation cracks, or moisture issues that could throw off your project later. Fix these problems before any cosmetic work starts, since basement waterproofing can get pricey at $5 to $10 per square foot.
Your ceiling height needs a close look – it’s a detail many people miss that can affect your options. Building codes need at least 7 feet of clearance, which might limit what you can do with low ceilings.
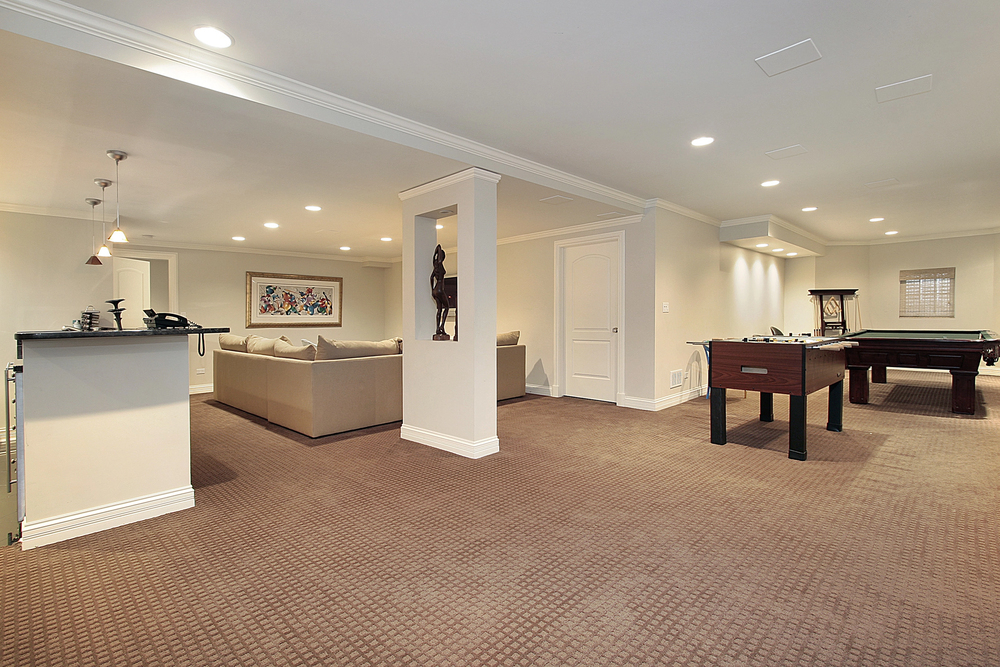
Set goals that match your space’s potential. One experienced contractor puts it this way: “You want to make everything fit for what you want to do”. If you’re dreaming of a big multipurpose room with game tables and a home theater, make sure you have enough square footage.
Your family’s needs should drive your space’s priorities. Whether you’re building a home office, entertainment area, or extra bedroom, knowing the main purpose will guide your project. This keeps your scope in check and your budget focused on what counts.
Creating a detailed budget breakdown
A solid budget helps prevent overspending. Basement remodel costs typically run from $12,070 to $33,687 with a national average of $22,138. But smart planning can cut these numbers down.
Break your budget into these main parts:
- Construction costs (demolition, framing, drywall)
- Materials (flooring, lighting, fixtures)
- Labor (if hiring pros)
- Permits and inspections
- Contingency fund (10-15% of total budget)
Your basement’s size drives the cost – a partial remodel under 700 square feet might cost $9,000 to $52,500, while a full 4,000 square foot basement could hit $300,000. That’s why you need cost estimates based on your specific space.
Permit fees usually cost $500 to $2,000, but many people forget about them. You also need money set aside for possible fixes – foundation repairs run $2,164 to $7,793, mold cleanup about $2,254, and asbestos removal around $2,200.
Material choices can lead to big savings. A renovation expert suggests: “Choose affordable materials: Opt for durable yet cost-effective materials such as laminate or engineered stone”. Leave utility areas like your furnace and water heater unwalled to save more, just keep them accessible.

Deciding what to DIY vs. hire professionals
Smart choices about DIY work versus hiring pros offer the biggest chance to save. You might save $10,000 to $20,000+ by managing and doing parts of your basement finish yourself.
DIY-friendly tasks include:
- Demolition work (saving $2,000-$5,000)
- Basic framing of non-load-bearing walls
- Painting and finishing touches
- Simple carpentry and trim work
- Basic floor installation (depending on material)
But leave these jobs to the pros:
- Electrical work (especially new circuits and panel upgrades)
- Plumbing installations
- Structural modifications
- Foundation repairs
- Code-compliant egress window installation
Your skills, time, and project complexity will help you decide. One contractor explains: “If you are entirely new to the idea of basement remodeling, a trusted contractor is going to be your best option”. People with some experience often find a mix works best – handling simple tasks while hiring pros for specialized work.
DIY mistakes can get expensive. Skipped permits, safety issues, and bad installations might save money now but cost more later. This rings especially true for electrical and plumbing work, which need permits and professional certification to stay safe and meet codes.
Hidden Costs in Basement Remodels and How to Avoid Them
Your basement remodel budget might spiral out of control despite meticulous planning. Materials and labor costs are just the beginning. Several hidden expenses can catch you off guard. A clear understanding of these budget-busters can save you thousands and keep your project on track.
Moisture and water management expenses
Water issues top the list of expensive hidden costs in basement renovations. Basement waterproofing costs average $5,214, and most homeowners pay between $2,459 and $8,183 based on the waterproofing method and problem extent. Simple waterproofing runs $5.00 to $10.00 per square foot.
Homeowners often find moisture problems after demolition starts. Minor issues need interior sealing starting at $500, while complete waterproofing systems for major problems can cost up to $15,000. A sump pump installation costs just over $1,000, and french drain installation ranges between $500 and $700.
The best strategy is to invest in proper moisture assessment early. Schedule waterproofing inspections before you finalize renovation plans. This preventative step saves thousands by identifying issues before wall finishing and floor installation.
Permit and inspection fees
Building permits might slip your mind while planning a basement remodel, yet you can’t skip them. These permits cost between $500 to $2,000 for basement renovations, and fees vary based on project scope and location. Many cities raise their permit fees each year. Houston, for example, increased building inspection and permit fees by 2.66% starting January 2024.
Permit approval takes about two weeks for large construction projects. Skipping required permits leads to penalties, problems during home sales, and unsafe conditions.
Here’s how to handle permits smoothly:
- Start your research early by contacting the local permitting center
- Submit your application well before your planned start date
- Get all required documents ready
- Set aside money for possible fee increases
These permits serve a purpose beyond paperwork. They ensure your renovation meets safety codes and protects your investment and family.
Unexpected structural issues
Structural surprises can wreck your basement renovation budget. One seasoned contractor shares, “I’ve been in this business for sixteen years and I have yet to be on a remodel that doesn’t have something ‘pop’ up”.
Foundation cracks, water damage, unstable support beams, and poorly installed floor joists are common problems. Foundation repairs cost between $2,000 and $8,000, but complex issues can cost more.
Look out for these warning signs:
- Foundation wall cracks (especially those wider than 1/8″)
- Uneven or sloping floors
- Doors and windows that stick
- Gaps between foundation wall and sill plate
You can protect yourself by scheduling a professional inspection before work begins. An expert suggests, “A home inspection BEFORE your renovation starts will possibly point out issues that you need to address which will affect your budget”.
HVAC and ventilation considerations
Basement renovations often need major changes to heating, cooling, and ventilation. Your current HVAC system might not handle the extra space, which means costly upgrades or replacements.
Expanding your existing HVAC system might seem cheaper at first. However, older systems (eight+ years) might need full replacement – adding $7,500 to $15,000 for a 2,000 square foot basement.
Good ventilation helps manage moisture in basement spaces. Dehumidifiers cost from $50 for small units to $2,000 for basement-wide systems. These devices help prevent mold and improve air quality.
Here’s how to avoid HVAC issues:
- Get professionals to check your current system before finalizing plans
- Leave enough room for HVAC parts and maintenance
- Look into specific dehumidification options for basements

Smart Material Selection: Quality vs. Cost Balance
Your basement remodel budget largely depends on the materials you choose. These choices impact not just your original costs but also how long things last and what maintenance you’ll need. Smart material selection can help you save more than $10,000 while creating a beautiful space.
Affordable flooring options that last
Moisture makes basement flooring a unique challenge. Vinyl plank flooring emerges as a great choice that combines durability, water resistance, and style at just $2.00-$10.00 per square foot. This material handles moisture well and looks like wood or stone without the steep price.
Carpet tiles work well on a budget too. They’re warm, comfortable and you can replace individual tiles if they get damaged. Paint on concrete floors is the most budget-friendly option. A well-prepared and sealed concrete floor costs less than other options and lasts really well.
Traditional ceramic tile costs $2.00-$30.00 per square foot and resists water better than anything else, but installation costs more. Laminate flooring runs about $2.00-$5.00 per square foot and works great in basements if you add moisture barriers or proper subflooring.
Wall and ceiling materials worth the investment
Standard drywall remains the cheapest wall option and installs more easily than paneling. Moisture-resistant drywall (green or purple board) costs a bit more but proves worth it in basements to avoid future issues.
Wood paneling adds warmth and texture to your space. Shiplap makes a budget-friendly choice that’s easy to put up. Expanded polystyrene foam panels offer another option that insulates and protects against moisture.
Painted exposed joists save money and create an industrial look that’s trending now. One renovator shares, “Leaving your ceiling exposed gives your space height and dimension. Paint the floor joists and subflooring a soft white to help reflect any natural lighting”.
Where to splurge and where to save
Quality waterproofing and insulation should be your top priority. These items might cost more now but prevent thousands in repairs later.
Lighting offers great ways to save money. Track lighting costs less than recessed fixtures, with LED tape or rope lighting running about $7.00 to $10.00 per foot.
Stock cabinets save you money compared to custom units. They start at $100 per linear foot while custom versions can reach $1,200 per linear foot. Solid surface countertops cost $20.00-$75.00 per square foot compared to granite at $140.00 per square foot.
Sourcing discounted and clearance materials
You can save big by buying during seasonal sales. Here are some smart ways to find deals:
- Shop at Habitat for Humanity ReStore locations for building materials at 50-80% off retail
- Look through local stores’ “bargain bins” for returns and discontinued items
- Buy floor models or display items for fixtures and appliances
- Use military discounts at major home improvement stores – usually 10% off up to $500
Quality materials pay off over time. One expert puts it well: “Investing in durable materials ensures they withstand wear and tear, reducing maintenance costs over time”. Smart choices about where to spend and save help create a basement that looks amazing and lasts – while keeping thousands in your pocket.
DIY Basement Projects That Save Thousands
You can cut your basement remodel costs by taking on specific DIY projects yourself. Learning a few simple skills and putting in your own time instead of money could save you thousands. Let’s get into which projects give you the best bang for your buck.
Demolition and prep work
Rolling up your sleeves for demolition work saves between $2,000 and $5,000. The steps are simple if you have the right tools and take proper precautions:
- Get your tools ready: sledgehammer, pry bar, reciprocating saw, and safety gear
- Protect HVAC ducts with plastic and tape so dust doesn’t spread
- Take doors off by cutting through jamb finish nails with a reciprocating saw
- Hit studs near the bottom plate instead of the middle to knock them loose
Safety comes first during demo work. Put on your protective gear – safety glasses, gloves, dust mask, and ear protection. A smart move for bigger basements is to rent a fan that blows dust outside through a window. This creates negative pressure and keeps dust from drifting to other parts of your house.
Framing and insulation installation
Framing walls on your own saves about $1,000-$3,000. Start by measuring and cutting 2×4 top and bottom plates, then mark your stud spots every 16 inches. You’ll need to secure the bottom plate to concrete using a hammer drill and concrete screws after you put down construction adhesive.
Rigid foam insulation works best against foundation walls before you frame. A 3/4-inch thick extruded polystyrene (XPS) does the job well for rim joists and foundation walls. Stay away from white-beaded expanded foam insulation – it won’t insulate as well or last as long. Make sure to seal any gaps between foam panels and around rim joists to stop air leaks.
You’ll run into pipes, beams, and utilities that need special attention in your framing plan. Use 2x2s across the joists to make room for anything hanging overhead.
Painting and finishing touches
Doing your own painting saves roughly $1,000-$2,000. Basements tend to be damp, so pick waterproof paint made specifically for basement use. This special paint helps stop moisture from seeping through concrete walls and prevents condensation between foundation concrete and drywall.
Good prep work makes all the difference. Clean your walls well, run a dehumidifier to remove moisture, and fill any cracks before you prime. Use latex primer on bare concrete walls for a lasting moisture barrier. Light colors help brighten the space and make it feel bigger.
Simple electrical work (within code)
While you’ll need pros for complex electrical work, you can handle some simple tasks yourself. Installing outlets and switches after the wiring’s done saves $500-$1,000. You can also save money by putting in basic light fixtures where junction boxes are already set up.
Note that all electrical work needs to follow building codes and might need permits. Here’s what you can safely tackle:
- Put in basic light fixtures where wiring exists
- Switch out old outlets for new ones
- Add dimmer switches to control lights
- Install wall sconces in pre-wired spots
Leave jobs with new circuits, panel upgrades, or wiring changes to the professionals. These tasks need licensed electricians to keep everything safe and up to code.
Working With Contractors: Negotiation Strategies
Smart negotiations with contractors can save you thousands on your basement remodel. Your approach when working with professionals often makes the difference between an average deal and a great one.
Getting and comparing multiple bids
Asking at least three qualified contractors gives you significant comparison points beyond just price. Here’s what to look for in proposals:
- Check the detailed cost breakdowns instead of just the final price
- See what each contractor’s bid has and doesn’t have
- Look at timelines, materials, and worker count
Don’t hold back questions if something isn’t clear in the bids. A better price from your second-choice contractor can help you negotiate with your preferred professional.
Timing your project for off-season discounts
Basement renovations work great in winter since contractors aren’t as busy. Many professionals give better prices and seasonal discounts to keep their schedules full during these slower months. You’ll spend less time waiting, and your project will finish faster because contractors have fewer jobs going at once. Material suppliers often cut prices during slow periods too, which helps you save even more.
Package deals vs. hiring specialists
Complex basement projects might cost less if you hire individual specialists instead of a general contractor – this cuts out markup costs. You won’t pay extra for someone to just coordinate things. A good general contractor brings value through project management though, and might get you better deals on materials.
Creating a contractor-friendly workspace
A well-prepared basement helps professionals work better and often leads to lower prices. One homeowner shared their experience: “When we hired a painter, he brought along a contractor. The price was doable and he could get it done quickly”. Make sure you clear a path to your basement, take out personal items, and set up good lighting. Taking care of small prep work shows contractors you mean business.
Phased Approach: Breaking Down Your Basement Renovation
Breaking your basement remodel into phases helps you manage your budget and timeline better. You can spread the costs and start using parts of your basement sooner by not doing everything at once.
Essential first-phase projects
Your first priority should be moisture problems before any cosmetic updates. A full moisture test should be your starting point. Just tape 2-foot squares of plastic sheeting to walls and floors and look for condensation after a couple weeks. This phase needs careful inspection of structural elements. Make sure to check floor joists and sill plates for rot or damage.
The rough construction phase comes next and usually takes 1-2 weeks. This phase has framing, electrical, plumbing, and HVAC work—these form your basement renovation’s backbone. Getting these elements right sets up everything that follows.
Creating a functional space before finishing
You can make your basement usable with limited funds by focusing on what’s needed first. The space becomes functional once framing and mechanicals are done. You might want to stop at the drywall stage. Your basement will be ready to finish whenever your budget allows.
A basement finishing company’s perspective: “When we partially finish a space we take it all the way to the drywall stage complete with mechanicals so it is ready to finish when you are”.
Spreading costs over time without doubling work
A phased basement finish makes financial sense but needs good planning. The original phase (partial finishing) costs $60,000-$90,000+ while completing everything adds $100,000-$200,000+ based on specifications.
Good planning prevents doing work twice. One expert says: “Start with your dream and work back down. Maybe do phase 1 here one year and phase 2 the following year”.
When to pause and when to push forward
Your best time to pause comes after rough construction but before finishing work. You reach a natural stopping point once drywall is up but before paint, flooring, and trim work begins.
Each construction phase typically needs about six weeks from start to finish. This timeline lets you plan breaks between phases as your budget allows.
Conclusion
Basement remodeling projects can save you substantial money without quality compromise. Smart planning, strategic DIY work, and wise material choices can reduce typical renovation costs by $10,000 or more based on my experience.
Your basement renovation investment could return up to 70% of costs during resale. Anyone can achieve professional results and keep thousands in their pocket with proper planning and execution.
Quality basement remodels start with the basics – waterproofing, proper permits, and structural integrity come before the finishing touches. A solid foundation for long-term success emerges when you focus on moisture management and essential systems, whether you complete the project at once or in phases.
Quality results don’t require overspending. Smart material choices, strategic sale purchases, and careful selection between DIY tasks and professional help create both savings and excellent outcomes. The strategies outlined in this piece will help you revolutionize your basement while protecting your budget effectively.
I found plenty of useful tips here. I particularly liked how you emphasised getting an early inspection for moisture and structure, which too many folks delay until it’s too late. The breakdown of DIY vs professional tasks was also helpful — knowing where you can realistically chip in and where it’s wiser to hire makes a big difference. Thanks for sharing these action‐oriented ideas!